We've significantly improved Givebutter Elements, including a rebrand to Widgets.
Our goal for these updates was to:
- Make installation and setup as easy as possible.
- Improving widgets onboarding with platform-specific instructions.
- Ensure full support of widgets on Wix.
- Improve the widgets library so that it is faster and more reliable.
Getting Started
To get started, navigate to a campaign you have, then select
Sharing
> Widgets
. You can also access widgets under Account
> Integrations
> Widgets
.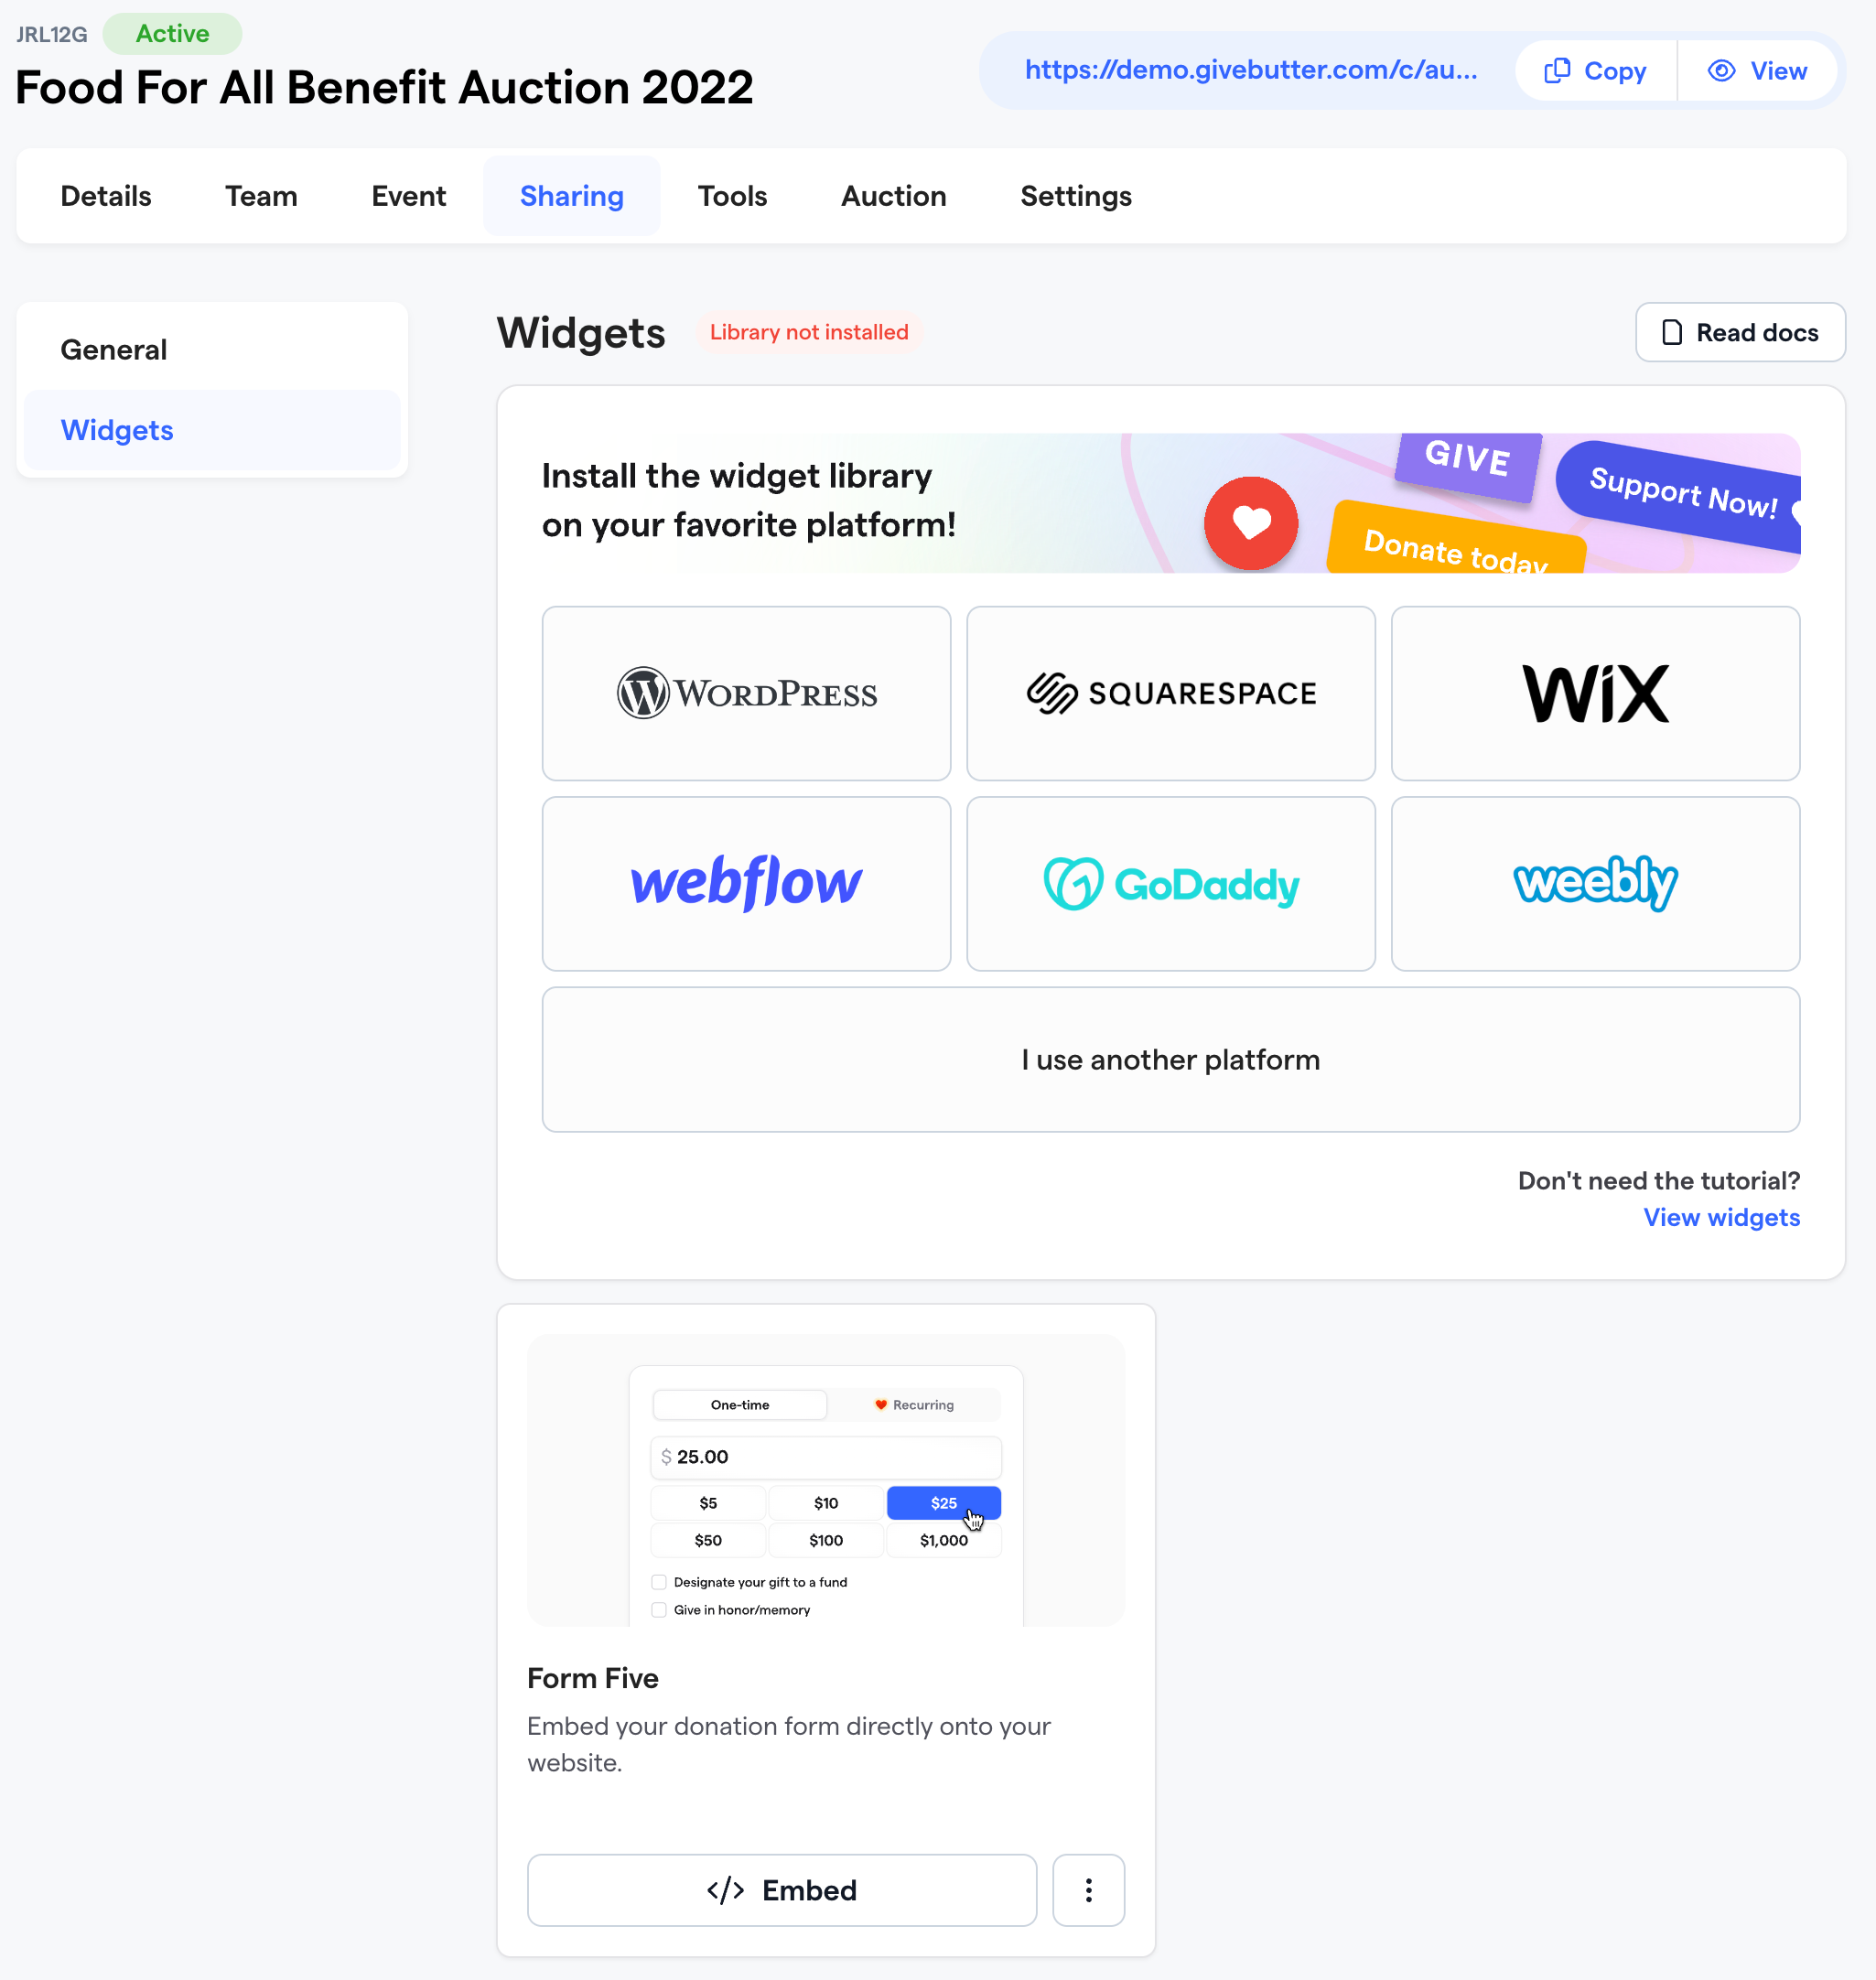
From here, you'll want to select from the platform you use to host your site. We have options for the following:
- WordPress
- Squarespace
- Wix
- Webflow
- GoDaddy
- Weebly
If you use another platform, you can select "I use another platform."
When you select another platform, you'll see instructions to install the widgets library on the platform you selected.
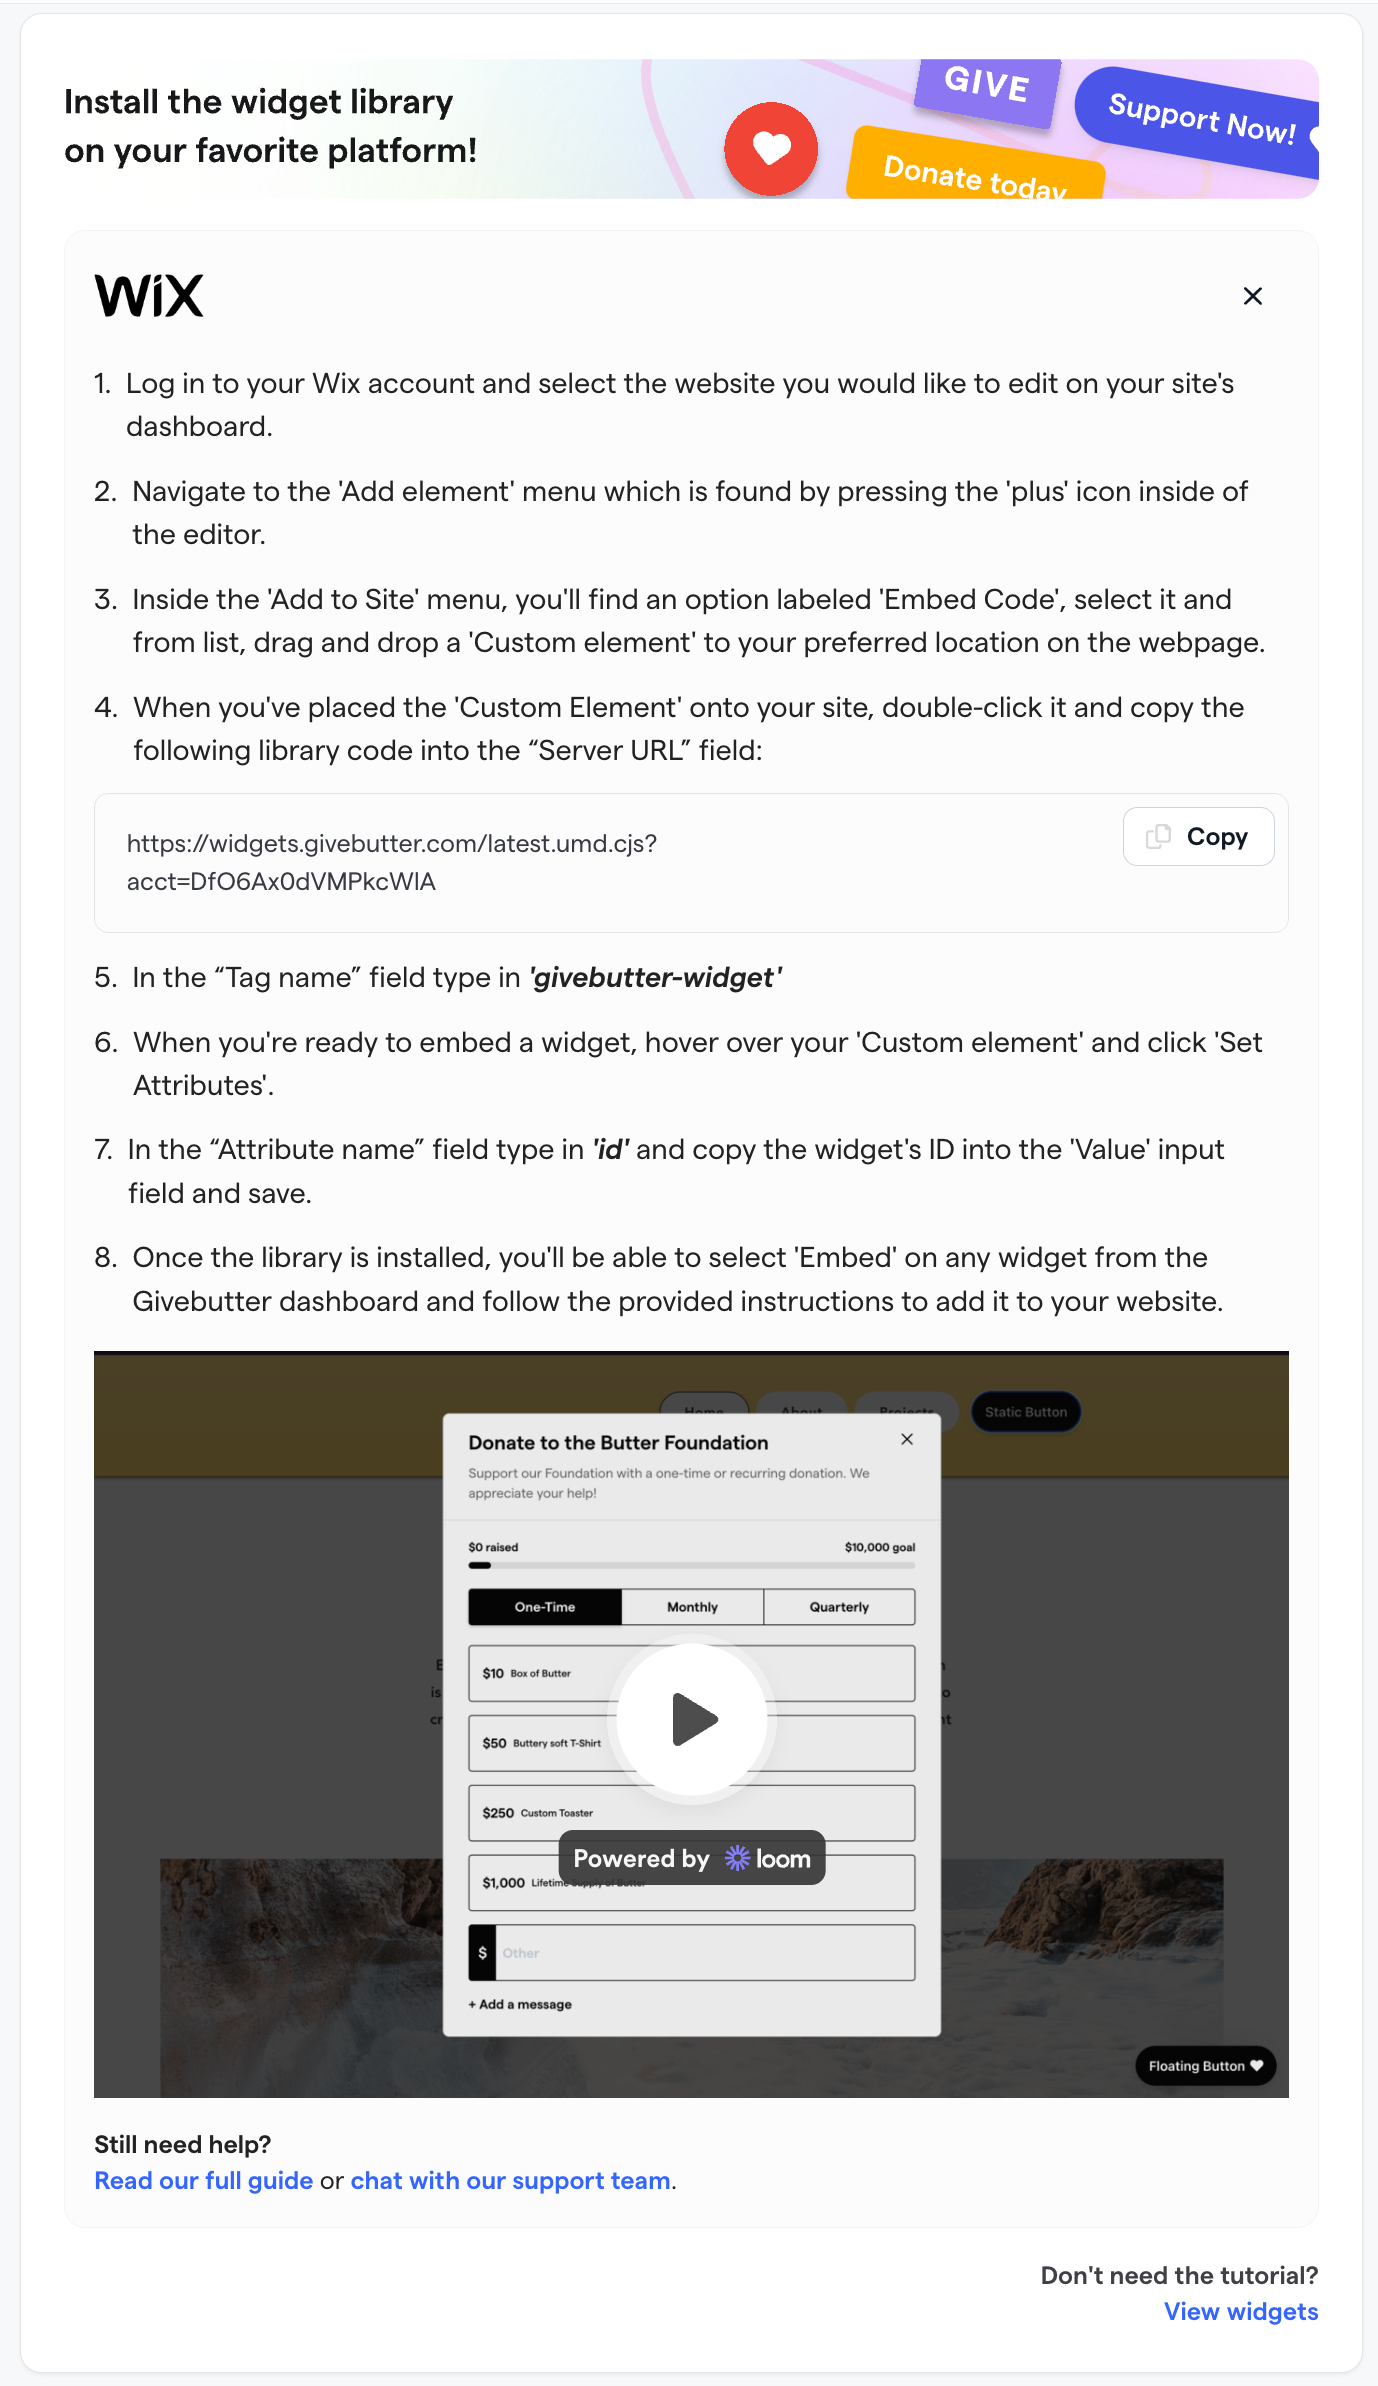
For additional support, you can reference our guide on widgets. You can also reference our API
Embedding a widget
Once the widgets library is installed, you can embed a widget.
You'll see two widgets automatically created for you under the
Campaign
> Sharing
> Widgets
. These are ready to embed without any further configuration. You can click </> Embed
to open a set of instructions that will instruct you on how to embed the widget you selected. Configuring a widget
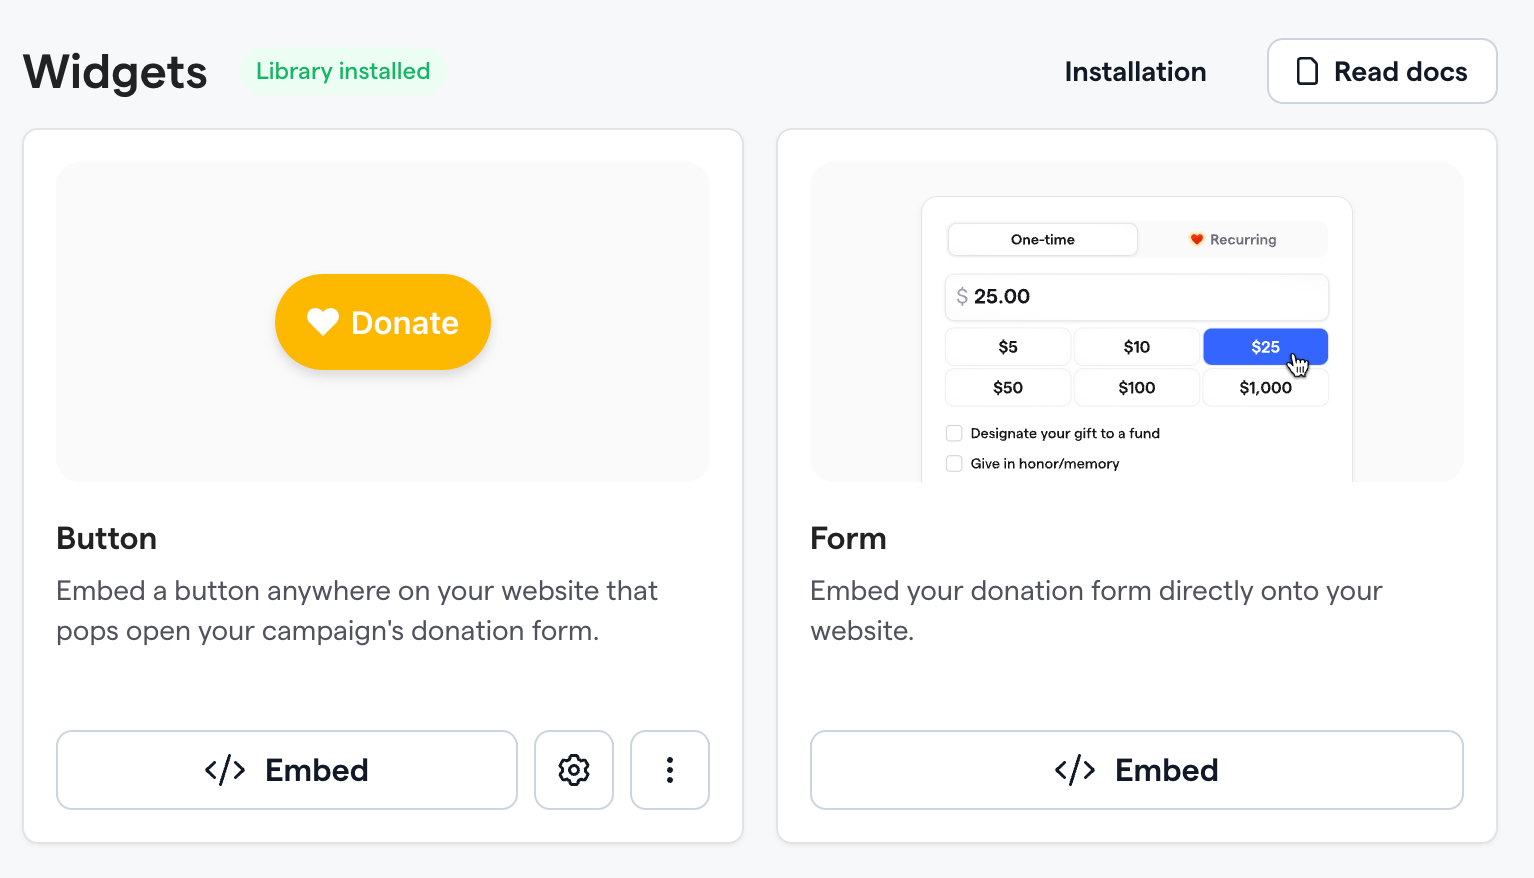
You have two options if you'd like to configure a widget or create new widgets.
- From the widgets page, under CampaignsorAccount Integrations, you can click the gear icon onButtonsto configure existing widgets.
- On the account settings page, you'll have the option to create a new widget.
When configuring a widget, you'll have the following options:
Configuring your widget as a
Button
or a Form
. A Button
can be placed anywhere on your website and will open a donation popup when a user clicks it. A Form
will appear directly on a page.If you select a
Form
, you can only configure the widget name and the campaign it is for. When you select a button, you will have the following options:
- Ability to name a widget.
- Select which campaign the widget applies to.
- Select whether a button is static or floating. Static buttons only appear where they are placed on your website. Floating buttons are viewable anywhere a viewer scrolls on the page.
- Select a background color.
- Edit the button CTA.
- Change the thickness of the button's outline and choose an outline color.
- Adjust the corner radius to make the button more square or rounded.
- Select the label color, which applies to the button's icon and CTA.
- Select an icon.
- Select left or right alignment for the icon.
- Enable a background shadow.
Once you've configured your widget, you can
Create Widget
and follow the instructions to embed it.